APFill is intended for calculating toner/ink coverage in PDF or PS files. It allows you to estimate the cost of printing a specific file. APFill separately measures CMYK, as well as up to 8 other colors in a file. Besides, APFill can also calculate ink coverage for bitmap formats, such as TIFF, JPG and BMP in the RGB or grayscale mode, which can be useful for printing on a black and white printer or for measuring the density of CMYK components that were separated and saved in a TIFF file, for example.
Besides the standard mode, when the user opens a file, measures it and gets the coverage calculation results, APFill has an automatic mode and can be started from the command line with various parameters.
In this case, once a PDF/PS file is processed with the specified parameters, APFill generates the results in the form of a CSV text file with values delimited with a semi-column. This file can be opened in MS Excel for further processing (calculation of net cost, retail price, etc).
Let’s take a look at two types of operation in the automatic mode. Most parameters in this mode are specified the same way, so the modes differ only in the way input and output files are defined.
1. Manual output file selection mode.
To work in this mode, APFill should be started with the COVERAGE в командной строке:
"C:\Program Files\APFill\APFill.exe" coverage -r300 -dA4 -c4 -show -noprogress c:\input.pdf c:\output.txt
In this mode, the user specifies the source file (c:input.pdf) and the output text file (c:output.txt) the results will be saved to. The meaning of other parameters (-r, -d, -c, -show,..) will be explained below.
2. Automatic output file generation mode.
This mode will be enabled if there is no COVERAGE parameter in the command line. In this case, the output file is not specified, but is selected automatically by APFill by adding “coverage.txt” to the name of the input file.
Example:
apfill.exe -r300 -dA4 -c4 -show -noprogress c:\input.pdf
If default parameters are used, the command can be as simple as
apfill.exe c:\input.pdf
In this case, the program will process the source file and will create an output CSV file called “c:input.pdf.COVERAGE.txt”
This mode is very convenient in that you can simply drag a PDF file on the APFill icon and the program will be started in this mode. The output file will be generated in the same folder.
Let’s take a look at the parameters that can be used in the automatic mode:
Example:
-r300 – means that the PDF file will be processed with the resolution of 300 dpi.
-dA4 – the default page size. This is the page size that will be used if it is not explicitly specified in the source PDF/PS file.
-show – show the calculation results as a table.
-noprogress – do not show the progress indicator on the screen. The program will work in the background.
How APFill can be used for automatic processing of files in a folder
For instance, APFill is installed on the server and you want it to process all the files that users copy to a specific shared folder.
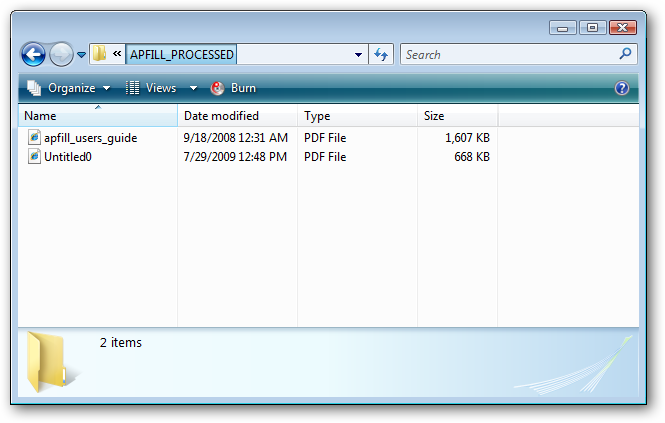
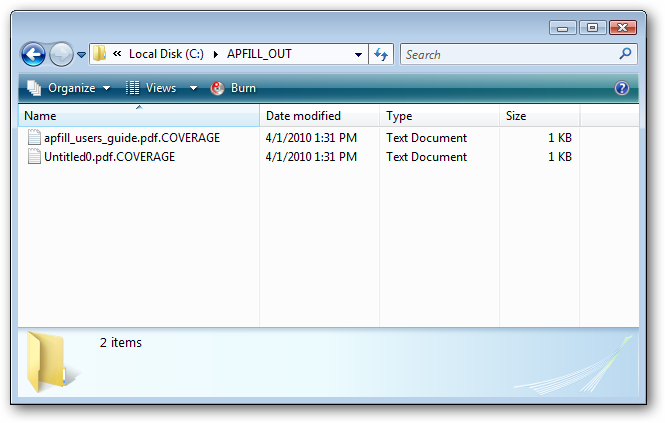
You have a folder called “C:PDFFolder” containing users’ files that are copied there for ink coverage calculations. You want APFill to automatically process these files and save the results in “c:APFill_OUT”. You also want to move processed PDF/PS files to “c:APFill_processed”.
To accomplish all of the above, let’s create a .bat file that will be started with an interval of 10 minutes. The file will process all the files and sort them by folders:
FOR %%I IN ("C:\PDFFolder*.pdf") DO "%ProgramFiles%\apfill\apfill.exe" -r300 -noprogress "%%I"

move /Y C:\PDFFolder*.p* c:\APFill_processed

move /Y C:\PDFFolder*.coverage.txt c:\APFill_OUT
The first line of the file starts APFill for all the files in the folder in the automatic mode (no progress indicator, 300 dpi). This is the second type of automatic operation supported by APFill, so the calculation results for each file will be saved in the same folder with “.coverage.txt” added to the end of the file name.
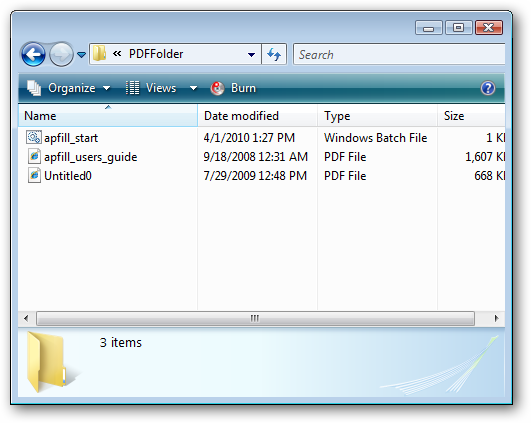
After processing, prior to copying:

The second line moves all the processed files (pdf or ps) to “c:\APFill_processed”
The third line moves the output files to “c:\APFill_OUT”
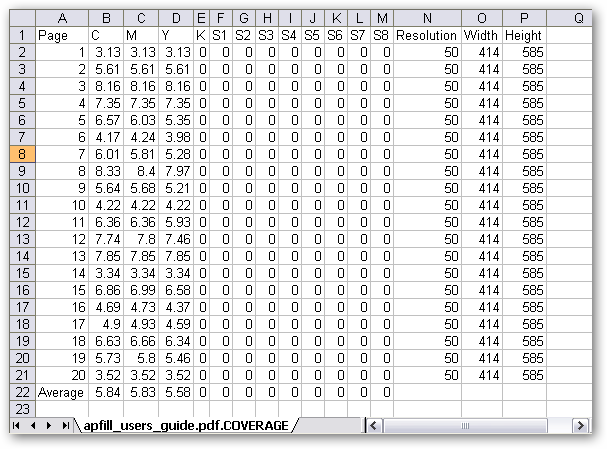
Below is a sample output file:

You can rename any output file to CSV and it in Excel: