TimeToPhoto enables you to print timestamps on photos, automatically rename JPG files and copy photos into folders according to the creation time/date value stored in the EXIF section of each JPG file.
Let’s take a look at how the program can be used for storing photos. For instance, we want to create a photo archive in D:\PHOTO, where photos will be stored in folders named according to their creation time. The collection will look as follows:
2008

\01

\02

\03

...

\12

2009

\01

\02

\03

...

\12
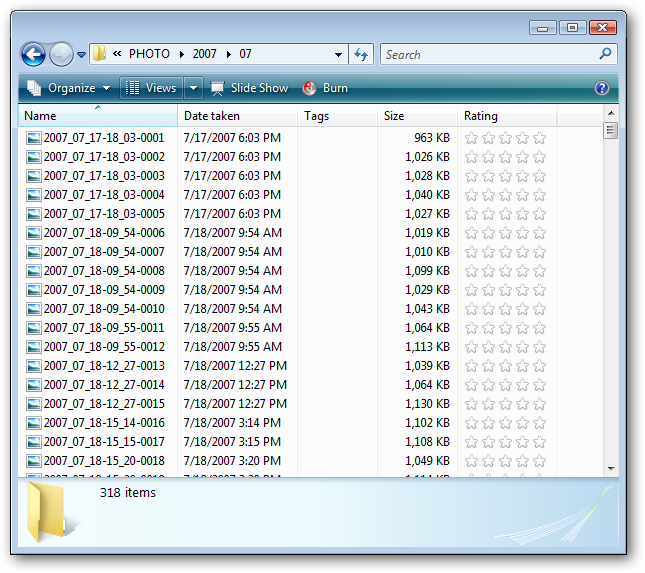
Photos should have names that will clearly let you know when they were taken, for instance 2009_01_23-16_51.jpg – the photo was taken on January 23, 2009 at 16:51.
Photo labs often print the name of the source file on the back of each photo. Therefore, if you use TimeToPhoto, you will be able to determine the date and time the photo was taken at just by looking at the name of the file printed on the flip side.
TimeToPhoto enables you to do all of this automatically.
TimeToPhoto DOES NOT MODIFY the original photos, but creates their copies, which guarantees that your original photos will remain unchanged. The necessary folders in D:\PHOTO will be created automatically, so you won’t need to do it yourself.
Let’s launch the program, find the files we’d like to add to our archive and add them to the TimeToPhoto processing list.
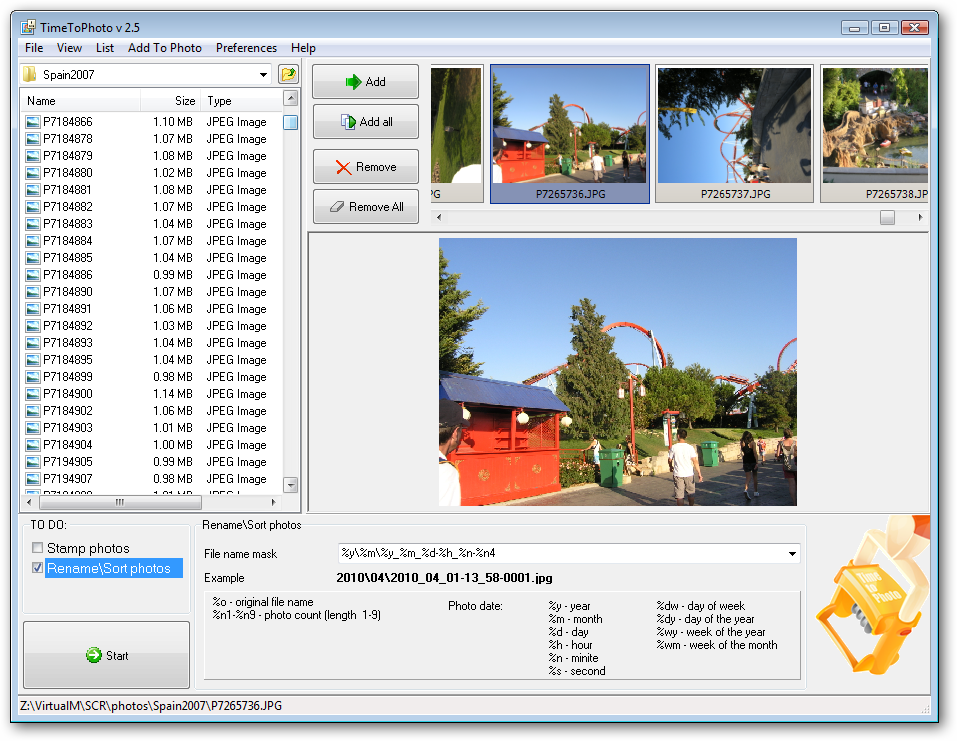
Let’s uncheck the “Stamp photos” option on the “TO DO” panel and choose the “RenameSort photos” option instead. We will also need to change the value of the “Text To Photo” field: “%y\%m\%y_%m_%d-%h_%n-%n4”. This value of this field can be selected from the dropdown list or specified manually. Photo names also contain a 4-digit number (%n4), as situations with several photos taken at the same time are possible. Therefore, a photo taken on 01.23.2009 at 16:51 will be renamed into 2009\1\2009_01_23-16_51-0001.jpg and the necessary folders will be created automatically. For more information about the parameters you can use in “Text to Photo” field, refer to the TimeToPhoto user’s manual .
Once you have finished configuring the settings, press the “Start” button, select the folder the photos will be saved to – D:\PHOTO – and press “OK”. The program will process the photos and save them to D:\PHOTO
All program settings are saved after the exit, so you can quickly add a new batch of images to the archive without configuring the filename mask again.
Related links: